There’s nothing quite like sipping a beer you brewed yourself. For many beginners, though, the world of homebrewing can seem intimidating—complicated equipment, confusing recipes, and hours of labor. That’s where homebrewing with malt extract comes in.
Malt extract brewing is one of the easiest and most reliable ways to get started. Instead of creating your wort from scratch with raw grains, you use concentrated malt syrup (liquid extract) or powder (dry extract). This simple swap reduces the time, equipment, and effort required—without sacrificing flavor.
In this guide, we’ll walk you through everything you need to know for your first successful brew, broken down into 7 simple steps. From sanitizing equipment to bottling your finished beer, you’ll learn a process that’s beginner-friendly, rewarding, and surprisingly fun. By the end, you’ll have the confidence to crack open a bottle and say, “I made this.”
👉 Whether you’re curious about homebrewing or ready to dive in, this article will give you the clear, step-by-step foundation you need to brew your first beer with ease.
Why Start Homebrewing with Malt Extract?
If you’ve ever wondered how to begin brewing beer at home without investing in complex equipment, homebrewing with malt extract is the ideal starting point. It bridges the gap between the simplicity of beer kits and the full control of all-grain brewing, making it perfect for first-time brewers.
What Is Malt Extract?
Malt extract is concentrated wort made from malted barley that has already gone through the mashing process at a professional brewery. Instead of spending hours steeping grains and carefully managing temperatures, you simply add this extract to your water to create the foundation for your beer.
- Liquid Malt Extract (LME): A syrup-like concentrate, usually packaged in cans or pouches. It’s easy to use but can be a bit sticky.
- Dry Malt Extract (DME): A powdered version with a longer shelf life, easier to measure and store.
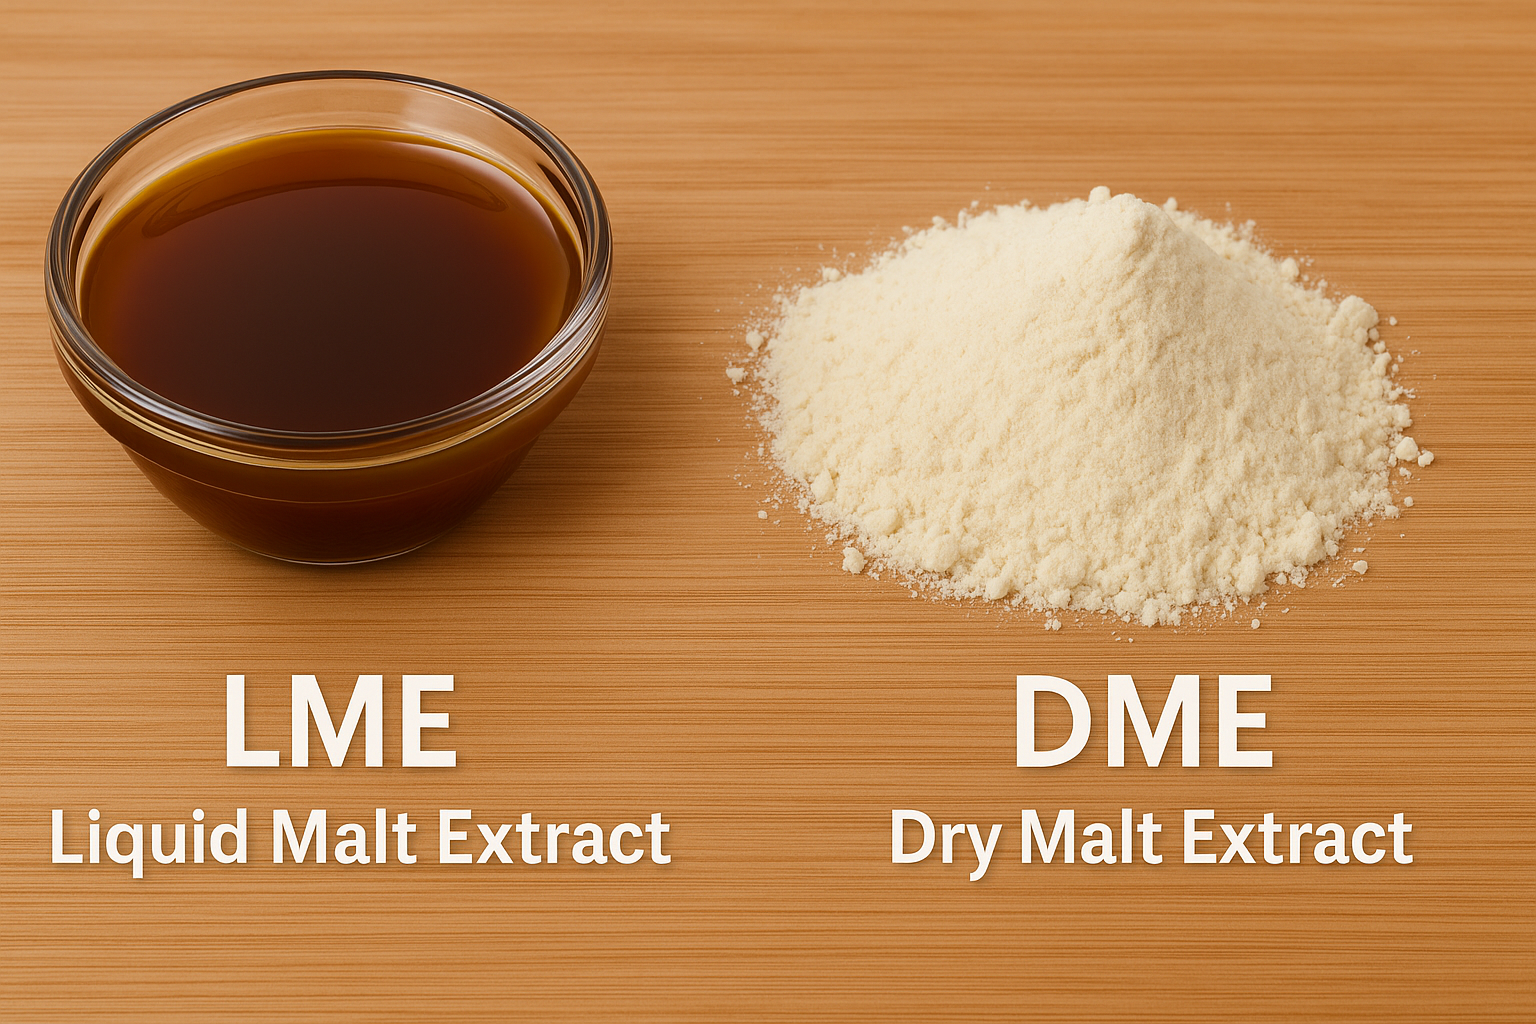
Both options deliver the essential sugars and flavors your yeast needs to create alcohol, body, and character.
Why It’s Beginner-Friendly
Using malt extract saves time and reduces the chance of errors. Here’s why many new brewers choose this path:
- ⏱ Time-Saving – Skip the mash step and go straight to boiling, cutting brewing day from 6 hours to 2–3.
- 🛠 Less Equipment – You only need a pot, fermenter, and bottles—no mash tun or sparging gear.
- 📏 Consistent Results – Malt extract is made under controlled conditions, ensuring reliable quality.
- 🌍 Easy to Find – Available at homebrew shops and online retailers worldwide.
Why It’s Still Real Brewing
Some people worry that extract brewing is “cheating.” In reality, it’s still authentic brewing—you control the hops, yeast, fermentation, and bottling. Think of it as cooking with a ready-made broth: you still add your own seasonings, ingredients, and creativity.
👉 If you’re eager to brew tasty, drinkable beer without overwhelming complexity, malt extract is your best first step.
The Essential Equipment You’ll Need
One of the biggest advantages of homebrewing with malt extract is that you don’t need an expensive setup. A few basic tools will take you from start to finish, and most can be reused for future batches.
Core Equipment for Beginners
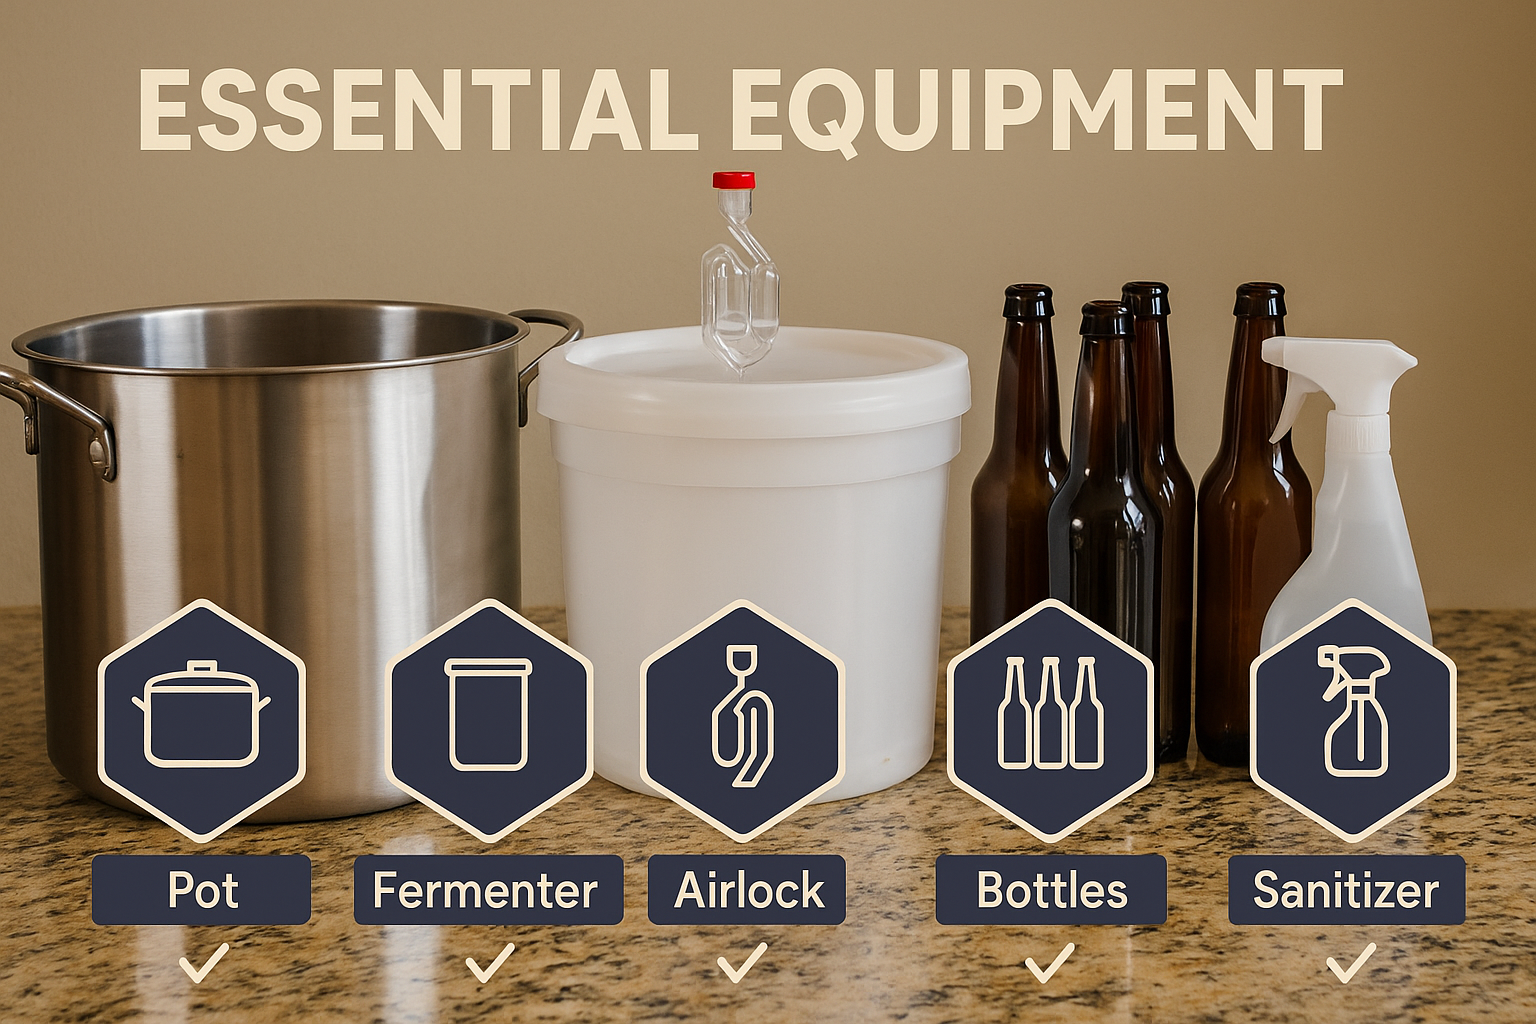
Here’s the minimal gear you’ll need for your first successful brew:
- Brew Kettle (Large Pot): At least 12–16 liters (3–4 gallons). A stainless steel pot is best.
- Fermenter with Airlock: A food-grade bucket or glass carboy where your beer will ferment.
- Long Spoon or Paddle: To stir malt extract and wort during boiling.
- Siphon or Auto-Siphon: For transferring beer from the fermenter to bottles without disturbing sediment.
- Bottles and Caps: Either recycle glass beer bottles (sanitized!) or buy new ones.
- Bottle Capper: A handheld tool for sealing caps.
- Sanitizer: The single most important “ingredient” in brewing. No-rinse sanitizers make life easier.
Optional (But Highly Recommended) Upgrades
While you can absolutely brew beer with just the basics, these tools make the process smoother and improve results:
- Wort Chiller: A coil that rapidly cools your wort after boiling, reducing risk of contamination.
- Hydrometer or Refractometer: For measuring sugar levels and tracking fermentation progress.
- Thermometer: To monitor water and fermentation temperatures.
- Auto-Siphon with Clamp: Easier transfers with less mess.
Starter Kits for Convenience
Many new brewers begin with a complete starter kit, which bundles most of these tools together. These kits save time, ensure compatibility, and often include malt extract recipes for your first brew.
Many beginners pick up their first hydrometer or auto-siphon from Amazon, where homebrewing accessories are widely available.
Choosing Your Ingredients
When it comes to homebrewing with malt extract, your ingredients are what shape the character of your beer. While extract provides the foundation, you’ll still decide the hops, yeast, and optional additions that give your brew its unique flavor.
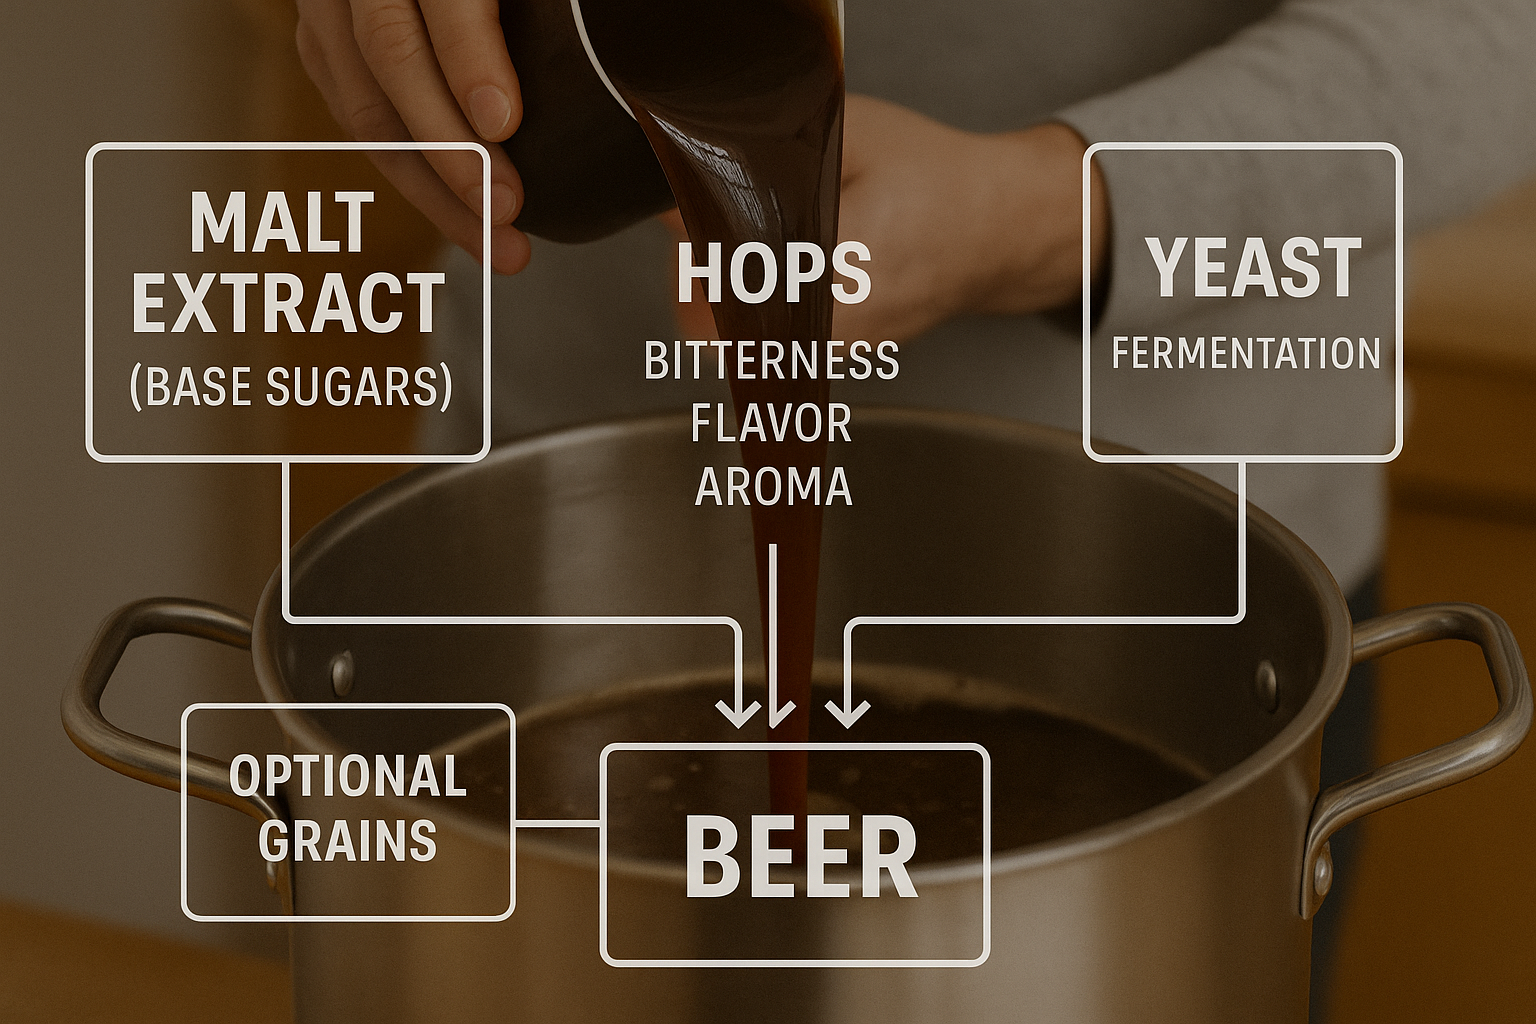
Malt Extract: The Backbone of Your Beer
Your recipe begins with malt extract, which provides the fermentable sugars and rich malt flavors.
- Liquid Malt Extract (LME): Syrupy, darker in color, and slightly less concentrated. Great for beginners.
- Dry Malt Extract (DME): Powder form, lighter and more consistent. Easier to measure, store, and blend.
👉 Many beginner recipes or kits will specify which type to use. If not, you can substitute DME for LME by multiplying weight by 0.8 (since DME is more concentrated).
Hops: Adding Bitterness, Flavor, and Aroma
Hops balance sweetness and bring complexity. They’re added at different stages during the boil:
- Early additions (60 minutes): Provide bitterness.
- Middle additions (15–30 minutes): Enhance flavor.
- Late additions (5 minutes or flameout): Contribute fresh aroma.
Popular beginner-friendly hops include Cascade, Saaz, and East Kent Goldings.
Yeast: The Magic Maker
Yeast transforms sugars into alcohol and carbonation. Choosing yeast is one of the most important decisions in brewing.
- Dry Yeast: Affordable, stable, and easy to pitch—ideal for first-timers.
- Liquid Yeast: Offers more variety and subtlety but requires careful handling.
For your first brew, an American Ale yeast (like Safale US-05) or English Ale yeast (like S-04) will deliver clean, reliable results.
Specialty Grains (Optional)
Want more complexity? Some extract recipes suggest steeping small amounts of specialty grains (like crystal or roasted malt) before adding extract. This adds depth, color, and flavor—without requiring full all-grain brewing.
First Styles to Try
For beginners, stick with forgiving beer styles that are tasty and easy to brew with malt extract:
- 🍺 Pale Ale – Balanced, approachable, and hop-friendly.
- 🍊 Wheat Beer – Cloudy, refreshing, with fruity yeast character.
- 🍁 Amber Ale – Malt-forward with caramel notes.
👉 If you’re curious about hoppy beers, see our Top 10 IPA Beers in the UK 2025 guide for inspiration.
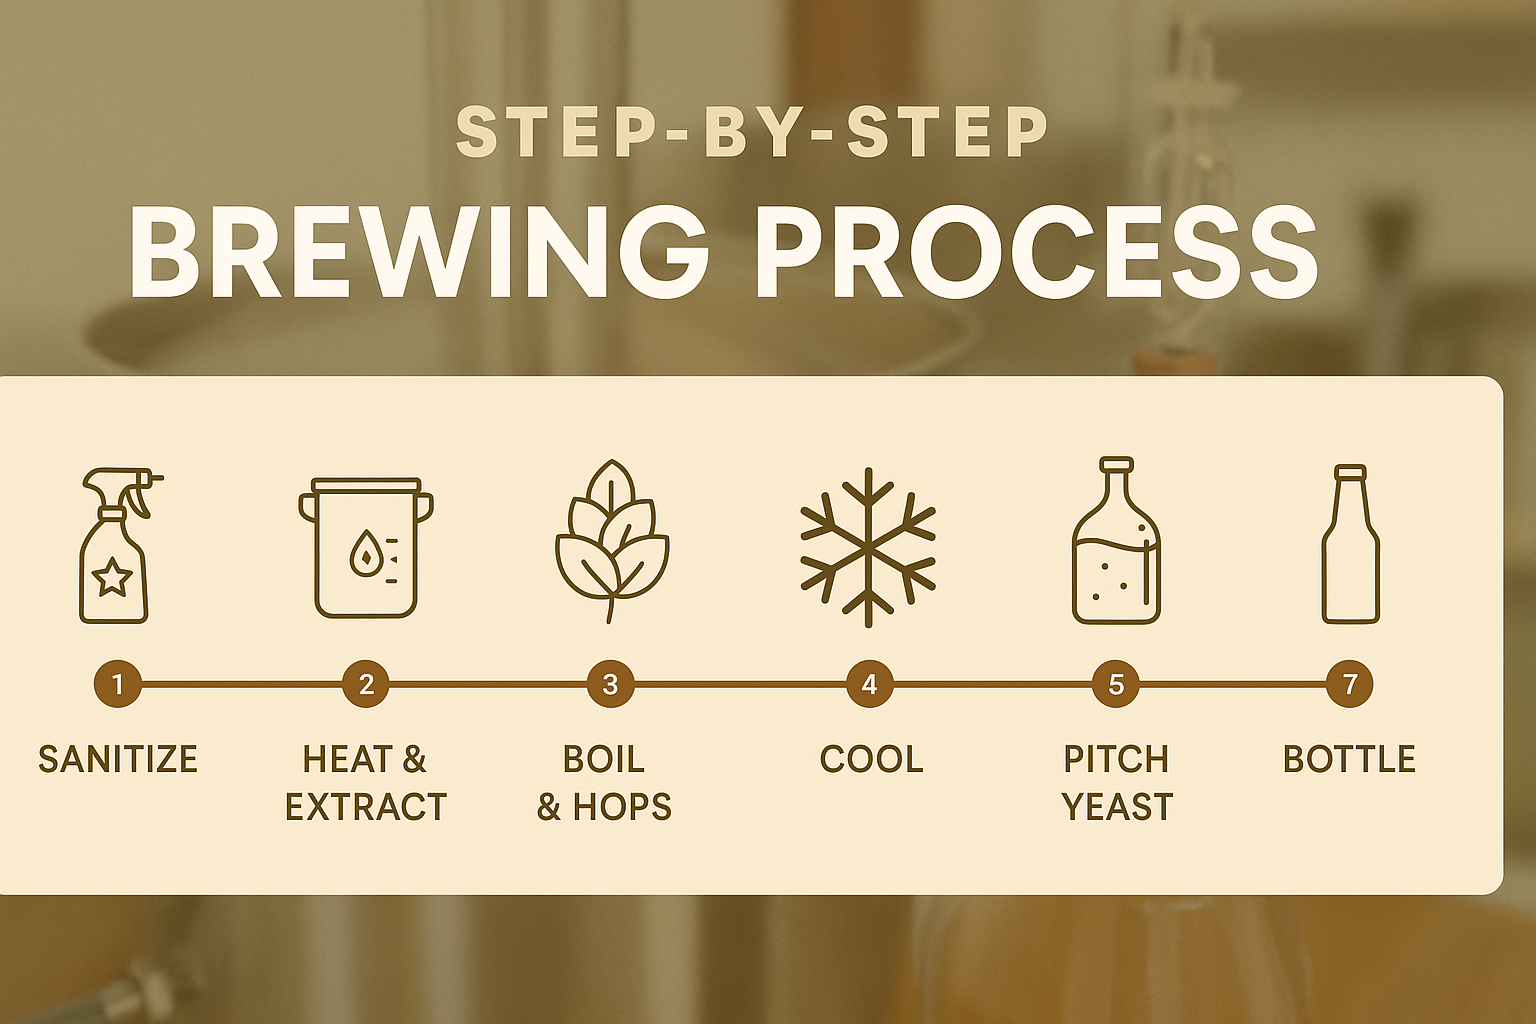
7 Simple Steps to Brew Your First Beer
Once you’ve gathered your equipment and ingredients, it’s time to brew. Here are the 7 essential steps for homebrewing with malt extract — simple enough for first-timers, but effective enough to produce a great-tasting beer.
Step 1 – Sanitize Everything
Clean equipment means clean beer. Most brewing problems (like sour flavors or flat beer) start with poor sanitation.
How to sanitize homebrewing equipment:
- Wash all items with warm water and mild unscented detergent.
- Rinse thoroughly.
- Soak in a no-rinse sanitizer (like Star San or Chemipro) for at least 2 minutes.
- Allow to air dry — don’t towel-dry.
👉 Think of sanitation as the “invisible ingredient” in every brew.
Step 2 – Heat the Water and Add Malt Extract
- Fill your brew kettle with about 9–11 liters (2.5–3 gallons) of water.
- Heat until warm (not boiling), then slowly stir in your liquid or dry malt extract.
- Keep stirring to prevent clumps or scorching at the bottom.
Tip: Remove the pot from heat while adding LME — it’s sticky and burns easily.
Step 3 – Add Hops (Boiling Stage)
Bring your wort to a rolling boil, then add hops based on your recipe.
- Bittering hops (60 min): Balance sweetness with bitterness.
- Flavor hops (15–30 min): Add depth and floral/spicy notes.
- Aroma hops (last 5 min): Preserve fresh hop fragrance.
This stage is where you shape the personality of your beer.
Step 4 – Cool the Wort Quickly
After the boil, the wort must be cooled fast to reduce contamination risk and improve clarity.
- Ice Bath Method: Place your pot in a sink filled with ice water. Stir gently.
- Wort Chiller Method: A copper coil circulates cold water through the wort for faster cooling.

Target temperature: 20–24°C (68–75°F) before moving to the fermenter.
Step 5 – Transfer and Pitch Yeast
- Transfer cooled wort into your sanitized fermenter.
- Top up with cold water until you reach your target batch size (usually 19–23 liters / 5 gallons).
- Aerate by shaking or stirring — yeast needs oxygen at the start.
- Sprinkle (pitch) your yeast directly on top, or rehydrate if the package suggests.
👉 Yeast is what transforms your wort into beer, so treat it with care.
Step 6 – Fermentation (The Waiting Game)
This is where patience pays off.
- Fit the airlock and store your fermenter in a cool, dark space.
- Ideal fermentation temperature: 18–22°C (64–72°F) (check yeast packet for specifics).
- Expect bubbling within 24–48 hours — this means fermentation is active.
- Allow 1–2 weeks for primary fermentation, until bubbling slows or stops.
Optional: Use a hydrometer to confirm fermentation is complete (stable readings over 3 days).
Step 7 – Bottling and Carbonation
When fermentation is complete, it’s time to bottle.
- Prepare a priming sugar solution (about 4–5 oz / 110–140 g sugar boiled in water).
- Add it to a sanitized bottling bucket.
- Siphon beer into the bucket, gently mixing with sugar solution.
- Fill bottles, leaving ~2.5 cm (1 in) of headspace.
- Cap tightly.
- Store at room temperature for 2 weeks for natural carbonation.
After conditioning, chill your first bottle, pour into a glass, and enjoy the satisfaction of drinking beer you brewed yourself.
📝 Quick Recap: 7 Steps for Homebrewing with Malt Extract
- Sanitize Everything – Clean and sanitize all equipment before use.
- Heat Water & Add Malt Extract – Stir extract into warm water to make your wort.
- Add Hops (Boil Stage) – Add hops at different times for bitterness, flavor, and aroma.
- Cool the Wort Quickly – Use an ice bath or wort chiller to reach 20–24°C (68–75°F).
- Transfer & Pitch Yeast – Move wort to fermenter, aerate, and add yeast.
- Fermentation (1–2 Weeks) – Store in a cool, dark place until fermentation finishes.
- Bottling & Carbonation – Add priming sugar, fill bottles, cap, and condition for 2 weeks.
👉 Follow these steps, and your first brew will be both drinkable and rewarding.
Troubleshooting Your First Extract Brew
Even when you follow all the steps, small issues can arise during your first attempt at homebrewing with malt extract. Don’t worry — most problems are common and easy to fix.

Common Problems and Quick Fixes
1. My beer tastes sour or funky
- Cause: Contamination from poor sanitation.
- Fix: Double down on cleaning and sanitizing equipment before your next brew. Unfortunately, this batch might not be salvageable.
2. There’s no bubbling in the airlock
- Cause: Possible leak in the fermenter seal, or fermentation hasn’t started yet.
- Fix: Check lid and airlock seals. If it’s within 48 hours, be patient — yeast often takes time to show visible signs.
3. My beer is too flat after bottling
- Cause: Not enough priming sugar, poor mixing, or bottles not stored warm enough.
- Fix: Store bottles at room temperature (20–22°C / 68–72°F) for 2 weeks, then chill.
4. Beer is too sweet
- Cause: Fermentation stopped early, leaving unfermented sugars.
- Fix: Ensure proper yeast pitching and fermentation temperature. Next time, use a hydrometer to confirm fermentation completion before bottling.
5. Strange sediment at the bottom of bottles
- Cause: Completely normal — it’s just yeast and proteins settling.
- Fix: Pour beer gently into a glass, leaving sediment behind.
Tips for Improving Future Batches
Once you’ve bottled and tasted your first beer, you’ll probably already be thinking about what to brew next. The beauty of homebrewing with malt extract is that it’s a flexible starting point — you can keep things simple or start experimenting to refine your craft.
Experiment with Hops
- Try different hop varieties to explore new flavors and aromas.
- Split batches: brew a simple pale ale, then divide it into two fermenters with different late-hop additions (e.g., Cascade vs Citra).
- Learn about dry hopping — adding hops after fermentation for fresh aroma.
Explore Yeast Varieties
- Switch from a clean American ale yeast to a fruity Belgian strain or a classic English yeast.
- Each yeast type brings its own character — from citrusy esters to spicy phenols.
Add Specialty Grains
- Steeping small amounts of roasted, caramel, or chocolate malts before adding extract boosts flavor complexity and color.
- This is called a partial mash — a bridge between extract and all-grain brewing.
Refine Your Process
- Use a hydrometer to track fermentation and improve consistency.
- Invest in a wort chiller for clearer beer and reduced contamination risk.
- Keep detailed notes: recipes, temperatures, fermentation times, tasting results.
Move Toward All-Grain (Optional)
When you feel ready, you can transition from extract brewing to all-grain brewing, which gives you full control over mash temperatures and fermentable sugars. Many homebrewers start with extract, refine their process, and then “upgrade” to all-grain.
👉 For more advanced guidance, check resources like the American Homebrewers Association’s brewing techniques.
If you’d like to learn from the pros and taste a variety of styles, check out brewery tours and beer experiences via Viator. It’s a great way to get inspiration for your next homebrew.
Homebrewing with Malt Extract vs All-Grain: Which Is Right for You?
If you’ve successfully brewed with malt extract, you may be curious about the next step: all-grain brewing. Both methods can produce excellent beer, but they differ in complexity, time, and control.
Key Differences at a Glance
| Aspect | Malt Extract Brewing | All-Grain Brewing |
|---|---|---|
| Time Required | 2–3 hours brew day | 5–7 hours brew day |
| Equipment Needed | Basic kit (pot, fermenter, siphon, bottles) | Mash tun, lauter tun, larger kettle, more space |
| Difficulty Level | Beginner-friendly, fewer steps | Advanced, requires precise temperature control |
| Flavor Control | Limited to extract choice + hops/yeast | Full control over mash, body, fermentables |
| Batch Consistency | High consistency, fewer variables | More variables, steeper learning curve |
| Cost to Start | Lower initial investment | Higher upfront cost for equipment |
Which Should You Choose?
- ✅ Choose Malt Extract Brewing if:
- You’re just starting out.
- You want reliable results without expensive gear.
- You prefer shorter brew days.
- ✅ Choose All-Grain Brewing if:
- You’ve brewed a few extract batches and want more control.
- You’re ready to invest in extra equipment.
- You enjoy experimenting with recipe design from scratch.
👉 Many brewers begin with homebrewing with malt extract to learn the process, then transition to all-grain once they feel comfortable. There’s no rush — plenty of award-winning homebrews (and even commercial beers) are made with extract.
Frequently Asked Questions (FAQ)
Is homebrewing with malt extract real brewing?
Yes! You’re still making beer from scratch. Malt extract simply replaces the time-consuming mash step, but you still add hops, pitch yeast, manage fermentation, and bottle your beer.
What’s the difference between liquid malt extract (LME) and dry malt extract (DME)?
LME: Syrupy, darker, slightly less concentrated.
DME: Powdered, lighter, easier to measure, longer shelf life.
Both work well — it comes down to preference and recipe requirements.
How much beer can I make with malt extract?
A standard beginner batch is about 19–23 liters (5–6 gallons), producing roughly 48 bottles (330 ml each). Smaller 1-gallon kits are also available for testing recipes.
Do I need special equipment for extract brewing?
Not at all. A large pot, fermenter, siphon, bottles, and sanitizer are enough to get started. Many beginners use starter kits that bundle these items together.
How long does homebrewing with malt extract take?
Brew day: Around 2–3 hours.
Fermentation: 1–2 weeks.
Bottling + Carbonation: Another 2 weeks.
In total, expect about 4–5 weeks from brew day to first sip.
Can I make different beer styles with malt extract?
Yes. You can brew a wide range of styles — pale ales, stouts, wheat beers, IPAs — by combining different extracts, hops, and yeasts. Specialty grains and dry hopping allow even more customization.
Where can I buy malt extract and homebrewing kits?
Most local homebrew shops carry them, and many reliable online retailers sell extract, hops, and yeast. 👉 Check Beers of Europe for malt extract kits and starter equipment in the UK and EU.
Final Thoughts – Brewing Confidence with Malt Extract
Starting your journey into homebrewing doesn’t need to be overwhelming. By using malt extract, you simplify the process while still creating beer that’s flavorful, unique, and entirely your own. With just a few pieces of equipment and seven clear steps, you can move from curiosity to clinking glasses with friends — and proudly saying “I brewed this.”
Remember: every great brewer started somewhere. Your first batch might not be perfect, but it will always be special because it’s yours. Each time you brew, you’ll learn more, refine your process, and gain confidence.
👉 Ready to take the next step?
- Explore our guide to Top 10 Beers to Pair with Chocolate for inspiration on enjoying your homebrew with food.
- Or, if you’re dreaming of hop-forward beers, check out our Top 10 IPA Beers in the UK 2025.
For those who dream of exploring beer culture beyond their own kitchen, pairing a brewery visit with a nearby stay via Hotels.com makes for a perfect beer weekend getaway.
And if you’re looking for the right gear to get started, browse beginner-friendly homebrewing kits at Beers of Europe.
🍺 Cheers to your first brew — and to many more to come!